
I was recently inspired to create a honeymoon package for my sister and brother-in-law (congrats newlyweds!). And there are so many wonderful ideas out in the world. I happened upon a few of these this past year and have been dying to try them! In addition, I have SO many patterns from stocking up during sales that I was motivated to make a first-aid kit with one. So here is the gift run-down!:
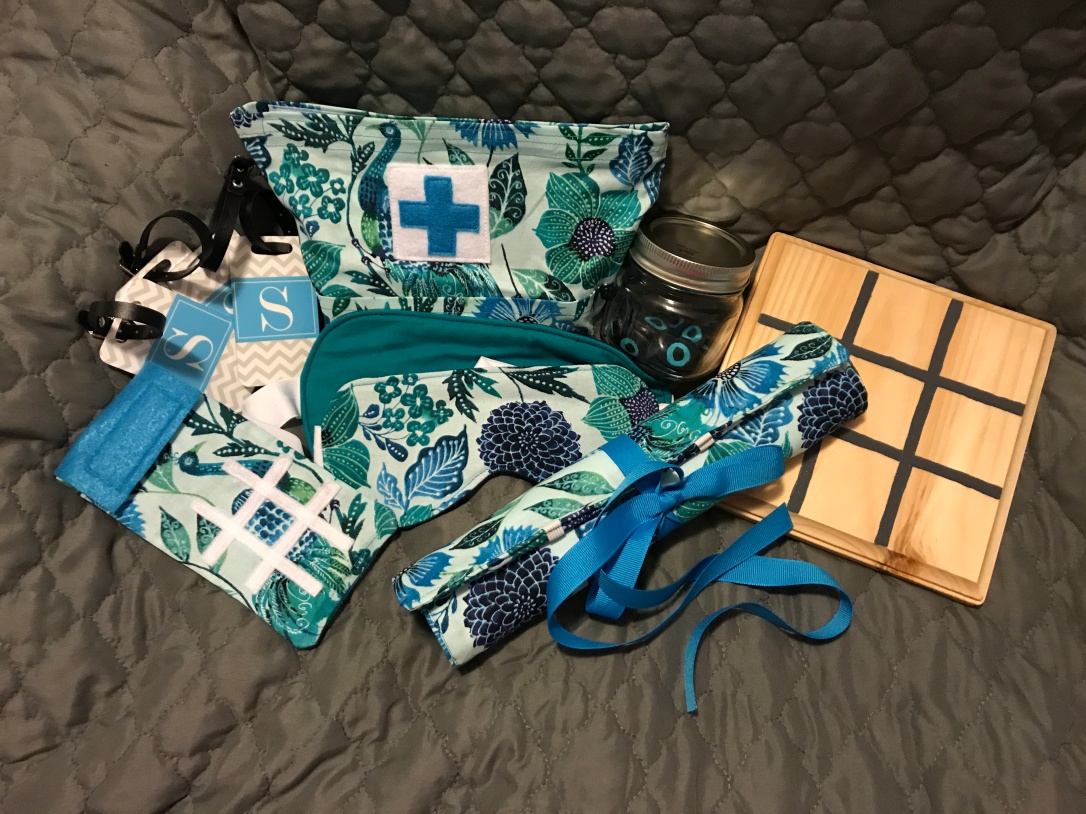
- Cord organizer
- His and Her’s eye masks
- Personalized luggage tags (Shutterfly)
- Traveling Tic-Tac-Toe for the flight
- First-aid kit
- A Tic-Tac-Toe board for the house patio (just because)
- A waterproof bag (bought)
So let’s start with the CORD ORGANIZER!
The original instructions are from: http://blog.namebubbles.com/diy-travel-cord-organizer-a-great-1-hour-project/#.VzT4_cdcVSU
But here are some tips for things I changed and areas I liked having more pictures. The first change I made was adding a velcro pocket for small things like headphones and USB ports. Velcro because I loathe zippers.
Your organizer can be any size depending on your needs. But I cut my pieces 13 inches by 20 inches. (the pocket was 4 inches by 9 inches finished).


Also, I wanted to have the same fabric on the front and back but needed it to have enough thickness. So I sewed the front side (where the pocket and elastic would be) onto a piece of felt. From there I sewed the pocket on and attached the velcro (measuring where the other piece of velcro would need to be with a fabric pen).
Pin the velcro to the front side and sew everything but the top portion that faces away from the pocket. You’ll want to ensure that the elastic slides underneath the velcro before you completely sew it down. I cut my two elastic pieces about 11 inches long. Yours will vary depending on how long you decide to make your carrying case.
I positioned the elastic strips 3 inches apart along the velcro. Then sewed the strips to the width I chose to make the gaps to hold the cords in place. I made them about 1.5 inches apart (again I’m an estimator 😉 )


After everything is sewn in place you lay your front and back pieces of the cord organizer together with right sides facing each other and pin it. Slide in some coordinating ribbon and make sure that you keep it away from the pins so you don’t accidentally sew it.
Make sure you leave a place to turn it. And after you get it all turn iron around the edges and topstitch. (I didn’t know what topstitching was forever when I first started sewing). So in case you don’t… it’s just sewing on top of the fabric, after you flip it, near the edge. It adds extra durability, close turning gaps, and it looks pretty too! Just use a coordinating thread.
ONTO THE HIS AND HER’S EYE MASKS:
The original instructions are from this site: https://makingthingsisawesome.com/super-cute-sleepy-eye-mask/
I liked that she used the Babyville Boutique Fold Over Elastic. It’s nice and wide but really soft.
I used this site to get a basic pattern for the mask and then adjusted it on my own depending on who I was making it for. (I love saving paper bags for this!) http://www.the-red-kitchen.com/2012/01/eye-mask-free-pattern-tutorial.html?m=1
To adjust a pattern just use two pens. Hold them next to each other and trace along the edge of the pattern and you will end up with an even enlargement. I added a 1/2 inch to each side of the red kitchen pattern because I thought it needed more coverage to block out the light. To make my brother-in-laws I just made the mask slightly longer using the pen method.

I tried a variety of different fabrics and colors to try to achieve something that felt lightweight but also blocked out the light. In the end I went with a dark middle fabric (navy blue fleece) and two darker colored coordinating fabrics. The first tutorial used light fabrics but I felt like the lighter ones let in a bunch of sunlight (which would drive me bonkers).
You can get your pint size helpers to figure out the best placement of the pattern and which fabrics look best!


Same idea as the cord organizer, lay your right sides facing each other and slide your elastic straps in avoiding any of the pins. (The tutorial I mentioned has good step by step photos).
Make sure you leave your spot to turn it. Afterwards trim away some of the fabric especially around the nose part. Flip it, iron it and topstitch. Tada!


TRAVELING TIC-TAC-TOE:
The tutorial is here: https://crazylittleprojects.com/2017/04/tictactoesewingpattern.html
She did a great job explaining it and I only changed one thing. Where she used ribbon and glued it on it chose to cut strips of felt and sew it on. I tried and ribbon and couldn’t quite get it to look like I wanted. So the felt worked better for me.

FIRST-AID KIT:
The pattern came from Simplicity so I can’t give you step by step on that one. But I used pattern 1153 Bag F, omitting the pocket. I also used velcro again instead of a zipper and adjusted the top as needed to fit it. Because again, I LOATHE zippers!
But the basics are you’ll make something like this with square corners:


My creative piece with this one was adding a felt cross to show that it was a first-aid kit. I used a super fancy pattern too.. A rubber block from my kids and clip art. 😉 Then fill it up with all sorts of goodies from the store (band-aids, ointment, chapstick, pain killer, eye drops etc…)


AND THERE YOU HAVE IT! Some creative gift ideas for the travelers in your life (or yourself!)
HAPPY CREATING!!

