

Yep that was a nod to Bubble Guppies. If you haven’t seen it you should definitely check it out! We all have those cartoons as parents that we oddly adore. This is our family’s. 🙂 http://www.nickjr.com/bubble-guppies/videos/bubble-guppies-we-totally-rock/
So back to the actual crafting! This one is all about repurposing ROCKS! Rocks for kids, rocks for you, rocks for gifts, rocks for everyone! But seriously; it’s two part:
- Tic-Tac-Toe board
- Rocks artfully designed by children 😉
Onto the Tic-Tac-Toe board. You’ll need:
- cleaned small rocks (I’ve had these sitting in my garage for almost a decade!)
- square wooden plaque (the size depends on your rock size- this is 6×6)
- paint
- mason jar (or another container to hold your rocks)


First you are going to sand your plaque unless you get a magically pre-sanded plaque. Which would be amazing! Then you’ll want to measure out evenly spaced squares. So here I put notches every 2 inches. If you are a messy painter like me you’ll want to tape off the edge of your plaque so your lines don’t flow over.
Next you are going to pick out your paint for the board as well as the rocks (to make your x’s and o’s). Now paint away! 3 seemed to be the magic number for me on this project. 3 coats of rock paint, 3 coats of board paint and 3 coats of sealer. Also for the black rocks, a lighter color paint seemed to work best. I tried a medium blue and it didn’t pop enough.


After the rocks and boards are dry, proceed to sealing them.
I ended up liking a mix of the Mod Podge and Krylon clear gloss sealer. But you could also just try the gloss version of Mod Podge. The combo I used was just what I had on hand. If you are doing a combo I would suggest 1 coat of Mod Podge and 2 coats Krylon. Or just 3 coasts gloss Mod Podge. Either way I think 3 is a good minimum. You can always add more just follow the drying instructions between coats.
I also sprayed the rocks with the same combination. Let it all dry overnight before you package it up and then have fun! It make a great gift too! (Bonus- the kids got their first tic-tac-toe lesson and loved it.)
*Make sure you spray the adhesive in a well-ventilated area and don’t do it with kids and pets around. It’s a good idea to wear a mask yourself and be aware of windy conditions to avoid spray back*


The original inspiration for the tic-tac-toe board (with a few changes) was from: https://tatertotsandjello.com/2015/04/diy-tic-tac-toe-game.html
WE TOTALLY ROCK ROUND TWO!
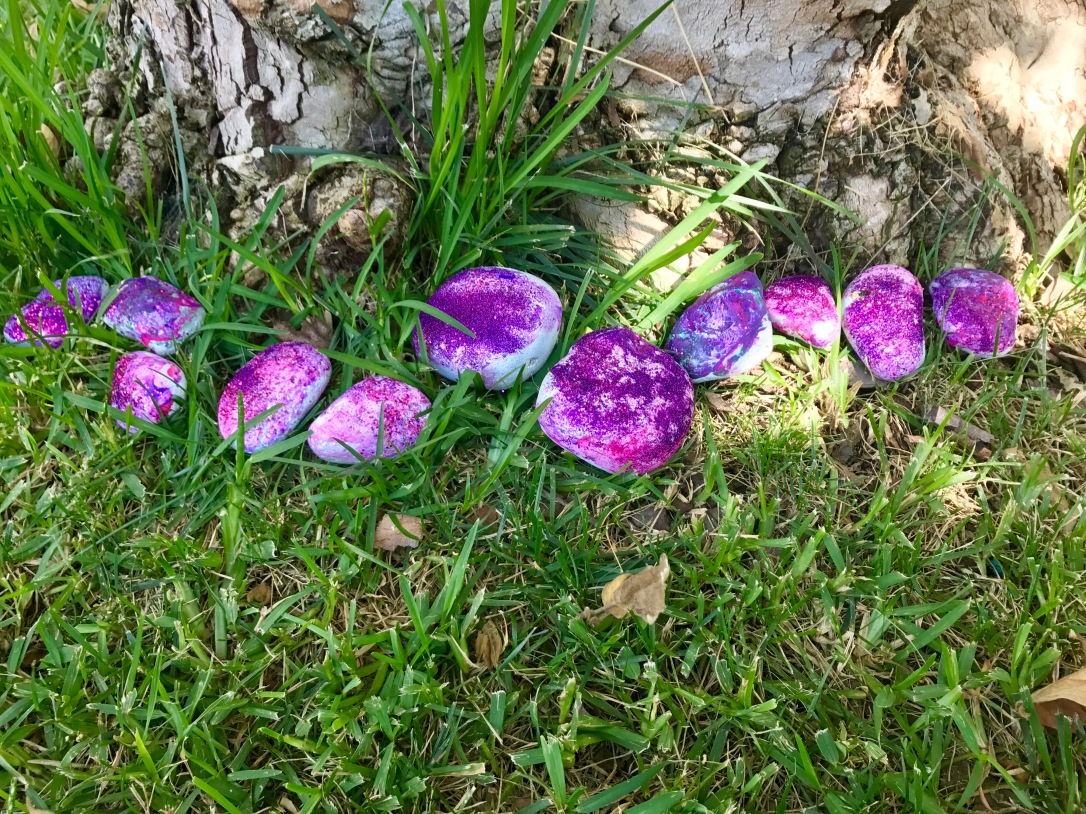
Most likely we’ve all seen these adorable painted rocks on Pinterest. My neighbor even sat down with my daughter to paint a ladybug and she loved it. So if your kids are patient and artistic go for it in the creativity department! There are so many beautiful ones out there.
But if you happen to have toddlers who love glitter and getting messy maybe try this instead.
We found some good size rocks and after cleaning them laid them out to dry. Then during nap time I spray painted them with a paint and primer in one. Two coats on the top side and one coat on the bottom. Let them dry and now you have an afternoon project! Luckily the day we painted was a beautiful day to sit outside under the tree.
*Make sure you spray paint in a well-ventilated area and don’t do it with kids and pets around. It’s a good idea to wear a mask yourself and be aware of windy conditions to avoid spray back*
You’ll need:
- rocks
- something to spray paint on (I use an old towel for this)
- washable paint (for toddlers) or acrylic if you’re older and/or feeling brave
- spray adhesive
- decorative elements such as glitter


Grab a blanket for your kids to paint on. We keep several painting blankets around since we always seem to need fresh ones. Then take out all the fun colors and decorative elements. Glitter is always a must in our house, hence the outdoor painting. And my son’s love of painting himself (and other objects)…


After the paint is dried spray the rocks with Mod Podge or a similar adhesive. Then decorate your yard, house etc…
Happy Creating!

