Cooking, Learning Together

Managing Meal Planning As A Family

Gone are the days that I just stop somewhere for dinner with my husband after work. Now we have young kids who like to eat around 5:30 and my husband’s ever-changing work schedule. So we NEEDED some serious planning that added some structure and predictability to our lives. And meal planning saves money-BONUS! 🙂

Initially I did this by myself but then I would catch my husband saying things like “she decides what I eat” and our daughter seemed to be uninterested in meal time. So I decided it was time for a shake-up!

It’s been 2 years now that I have been doing it this way and it works great for us!

The basic principle-PLANNING!

  • Have a day that you sit down to review grocery ads, digital coupons and make note of the things that need to be eaten in the house.
  • Have a meal planning document listing your usual “go-to recipes” so you always have some inspiration. (more on this below) 
  • Match up the items on sale etc.. (from bullet 1) with the meal planning document.
  • In a notebook have one side listing the days of the week (whichever day your week starts with) along with the ingredients you need to make it happen.
  • Go shopping in your pantry, fridge and freezer before leaving for the store.
  • When you get home post the weekly menu somewhere that everyone can see it so they know what to expect. I also find it helpful to have an area to list leftovers so that things don’t get lost in the fridge abyss.

Helpful tip: Some people like having certain days of the week dedicated to specific types of food. I found this to be a bit too restricting in the spirit on saving money since certain items need to be eaten first (soon to expire, thawed etc..). So how about instead we commit to a THOUGHTFULLY THRIFTY day? We have one of these a week and it rotates from week to week. But it reminds me to make really budget friendly meal at least one day.


So you might be wondering how this is actually a family affair.

Get your kids involved in the weekly ad process. Go through the ad together, have them identify items (helping with name recognition) and discuss the cost of items. Explain what the purpose of ads and coupons are and why we use them. Then ask them to pick out items that look appealing to them.

The first time I did this I really expected them to just hunt down cookies, cereal etc.. But surprisingly they really enjoyed picking out fruits and veggies.  Then when we go to the store they can pick the items out, check them off the list and recognize them when we make meals.

FullSizeRender 2

So about the meal planning document. Here is the one we use. It doesn’t encompass every meal we make but includes ones that are easy enough for a weeknight but can be dressed up. Meal Planning Document

This is the part I get my husband involved in. I will hand him the laminated meal planning document and ask him what he would like to eat this week. He will usually pick out 1-3 things and then I fill in the rest.

After all the planning is done I write it up on our chalkboards and head to the store!

So go out there, get organized, save some money and have fun!

Learning Together

At Home Dinosaur Dig

One afternoon I needed to find a creative way to entertain my kids with something they hadn’t played with before while also not purchasing anything new. I was getting frustrated with all these tiny plastic creatures we always seem to have underfoot and the leaning tower of play-doh. And we had just watched Dinosaur Train. So I thought, what if we make fossils??

My 2-year-old loves to smash anything so smashing play doh- PERFECT! My 4-year-old enjoys reading, learning about animals and “cooking”. And I have a large amount of opened bags of rice, dried beans, lentils etc… that seem to keep spilling in my pantry. So in lies in the inspiration for- A DINOSAUR DIG!

The materials you’ll need:

  • A bin (preferably clear) with a lid (very important to have the lid)
  • Dried beans, lentil, rice, barley (whatever you choose!)
  • Small plastic creatures (we did dinosaurs, bugs, shells & fish)
  • Spoons or utensils to dig with
  • Trucks, jewels etc.. (optional)
  • Play-doh

The kids dumped the random bags of rice, beans, lentils and barley into the bin till it filled it half way up. Then we mixed it all up and I buried the creatures in the rice. The kids chose their utensil (or truck) and started looking for the creatures.

I took a break here to read the kids a short book about dinosaurs while they played with the ones they had found. Then we took out the play-doh. We rolled it into medium size ball and they smashed them flat. Then we talked about how fossils are made as we pressed the creatures into the play-doh. When they took it away they were surprised to see the “picture of the dinosaur” in the dough just like fossils.

Then of course we had to mush up the “fossils” just for fun.

IMG_6733

This is where the lid comes in- put it on that box before you end up with a floor full of rice! 🙂

The kids, especially my daughter (4y/o), will frequently ask for the rice and beans box. She likes to sit outside under our tree and bury her various gems in the rice and use the excavator and dump truck to find all of them. There are lots of possibilities when it comes to a box of rice. Done in the right setting it won’t be a huge mess to clean up and will be lots of fun!

Happy Creating!

Learning Together

Tell Me A Story… Creating Together.

“Once there was a duck and a cheetah. They were hungry so they went to a restaurant. They ordered pepperoni pizza and watermelon. The waiter brought their food and they paid him. Then they were thirsty so they went to visit the ocean to get a drink of water. And they met their friends sharky and fish.”img_4631.jpg

Looking for a way to engage your kid’s creative side without a lot of work? Grab a box, put 8-10 random items in it from your toy stash and begin. Ask them to pull each item out and identify it. Then start by encouraging them to explain the relationship between each item.

Are the duck and cheetah friends? What do they like to do together? I wonder if they have other friends. etc…

Both kids were a little unsure at first but as soon as I started asking questions they dove right in. I was so excited to see their eyes light up and see their brain start to make connections. They both love to read but being 2.5 and 4 I wasn’t sure how far they would go with creating a story. But they loved it! This will definitely be a regular thing for us since it doesn’t require any special materials.

Important to note: I originally asked each kid to pick out 2 items and then I picked out the rest. Interestingly enough they didn’t choose any of the items they had originally picked out. And more than 10 item seemed to be overwhelming. In the end they picked 8 items to tell their story but I think 8-10 is probably a happy range.

Hope you enjoying getting creative with your littles too!

Sewing

Bird Wings: The Best Way to Use Up That Huge Box of Scraps!

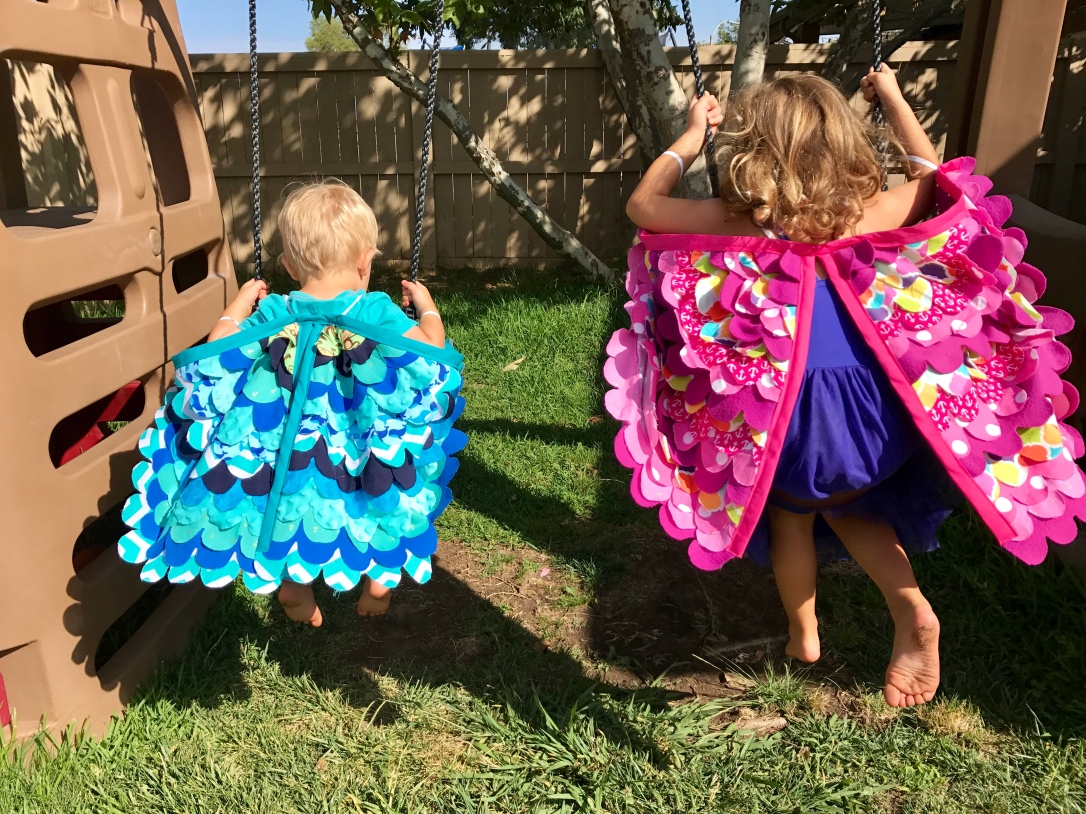
To be honest I have a RIDICULOUSLY large amount of scrap fabrics that are just waiting for some creative inspiration to strike. And just in time for spring… summer… cleaning- bird wings! Bird wings for everyone! Seriously I made one for each of my kids and two as gifts ;). I am in love with this idea!

fullsizeoutput_19d

I got the idea from these two tutorials:

https://probablyactually.wordpress.com/2012/10/29/halloween-sewing/ Probably Actually had the amazing idea to bind the edges and make them a tad bigger to fit an older kid. And the mask is an adorable addition.

http://www.prettyprudent.com/2011/04/baby-kid/how-to-make-beautiful-dress-up-wings-2/ Prudent Baby was the original one I saw, so cute and easy to adapt to each person’s individual’s needs.

So Let’s Begin!…

I have a 2.5 and 4-year-old and they both helped me sort out the huge amount of fabric into piles based on color. Then from there I challenged them to pick out their top 5 favorite fabrics. I grabbed a couple coordinating ones to add to the pile to make it pretty. And then it began.

During naptime, the 4-year-old and I would pick out fabric, sketch the pattern, cut it out and sew it on (in her requested order). Afterwards we all went to Joann Fabric and each kid picked out their double folded quilt binding and I sewed it around the edges, just like Probably Actually did. I added boning, because I had it, but it isn’t necessary. In fact, I didn’t add it to the two gifts I made and they came out the same.

I feel Iike two huge perks to this project is that (1) the kids were able to participate a lot more than they usually do and (2) I used up all those teeny tiny bits of fabric that are never big enough for anything else. Lastly- it allowed for some amazing creativity in picking out coordinating colors. Almost like quilting, but so much faster!!

SOOOO… This is what you will need to complete this imagination boosting and scrap cleaning masterpiece!

For my 4-year-old I did a 17 inch (H) by 15 inch (W)

For my 2.5-year-old I did 15 inch (H) by 15 inch (W)

  • Paper bag or some material for measuring out a wing to your desired shape, and also the feathers.
  • 2/3 yard of fabric for wing base plus some extra for adding that same color into the “feathers”
  • Any scrap fabric that coordinates with your base color
  • ¼ in elastic (length dependent on your kids wrist size and shoulder size)
  • Double fold bias tape quilt binding in a coordinating color

Here on some step by step photos:

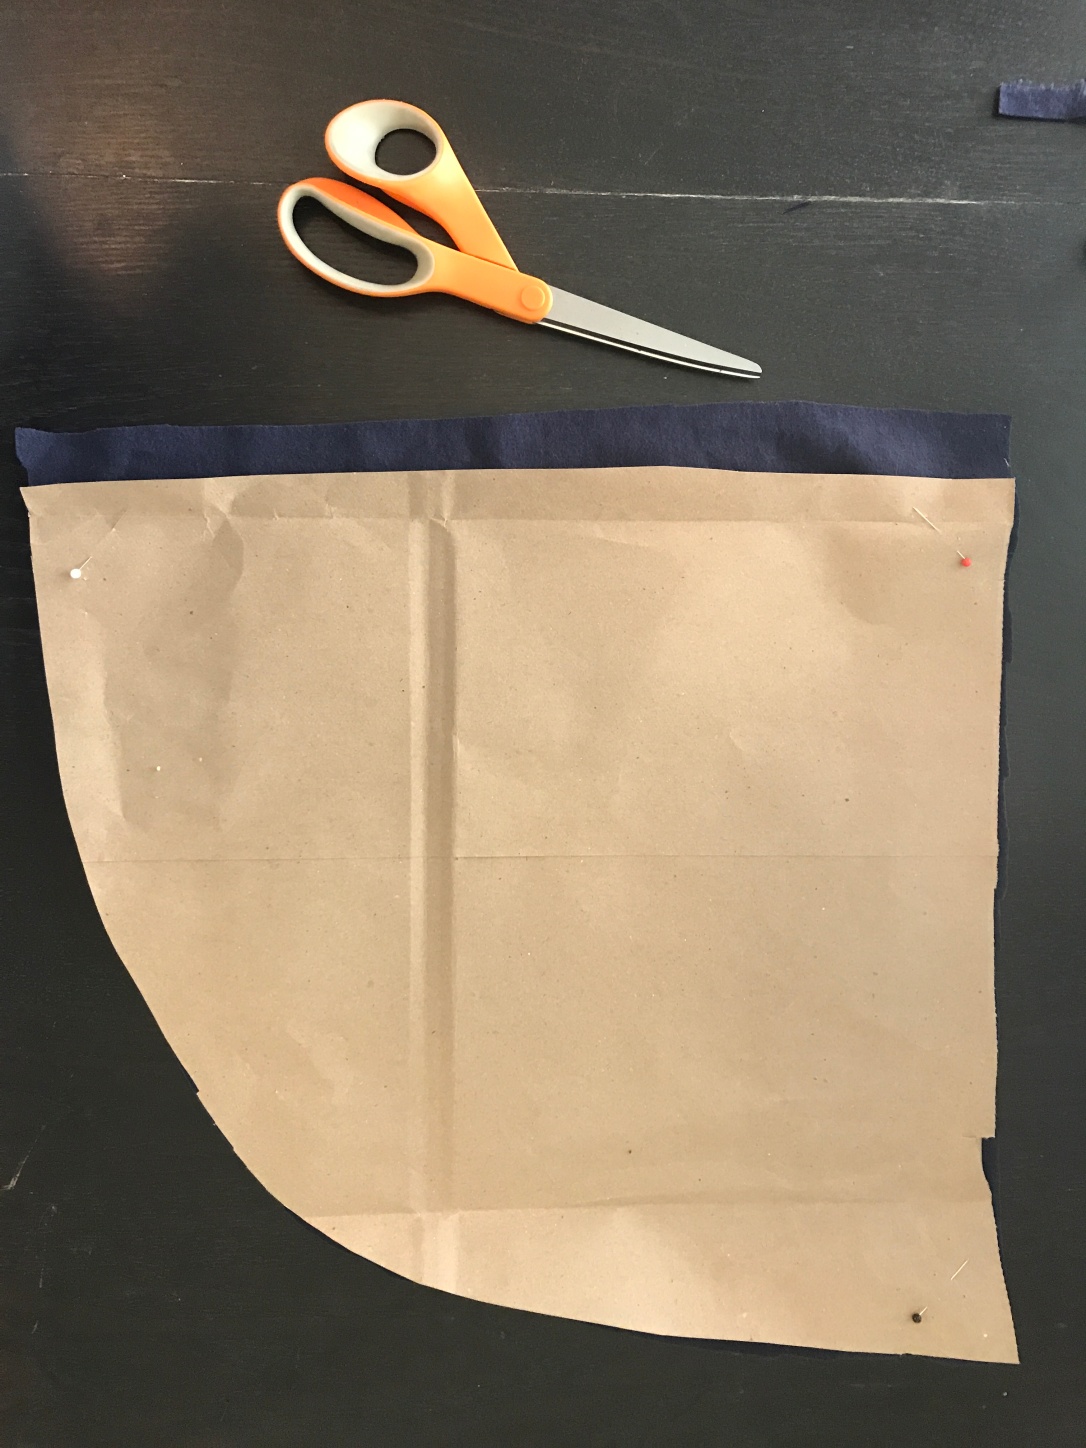
You’ll want to iron your base fabric (I don’t pre-wash things that I am not going to regularly wash- personal preference). To make the pattern I just measured out the kids arm lengths and made the same measurement for the length. Then just connected the two points to make the curved part of the wing. Cut it out and then lay it on your fabric. Make sure if you are not using a solid color that you account for flipping the wing to have the same pattern on the inside (mirror image). So in this photo the orange and black pins represent the side that will be vertical.

As you can see I am not a perfectionist when it comes to making straight lines on forgiving projects.

IMG_4237

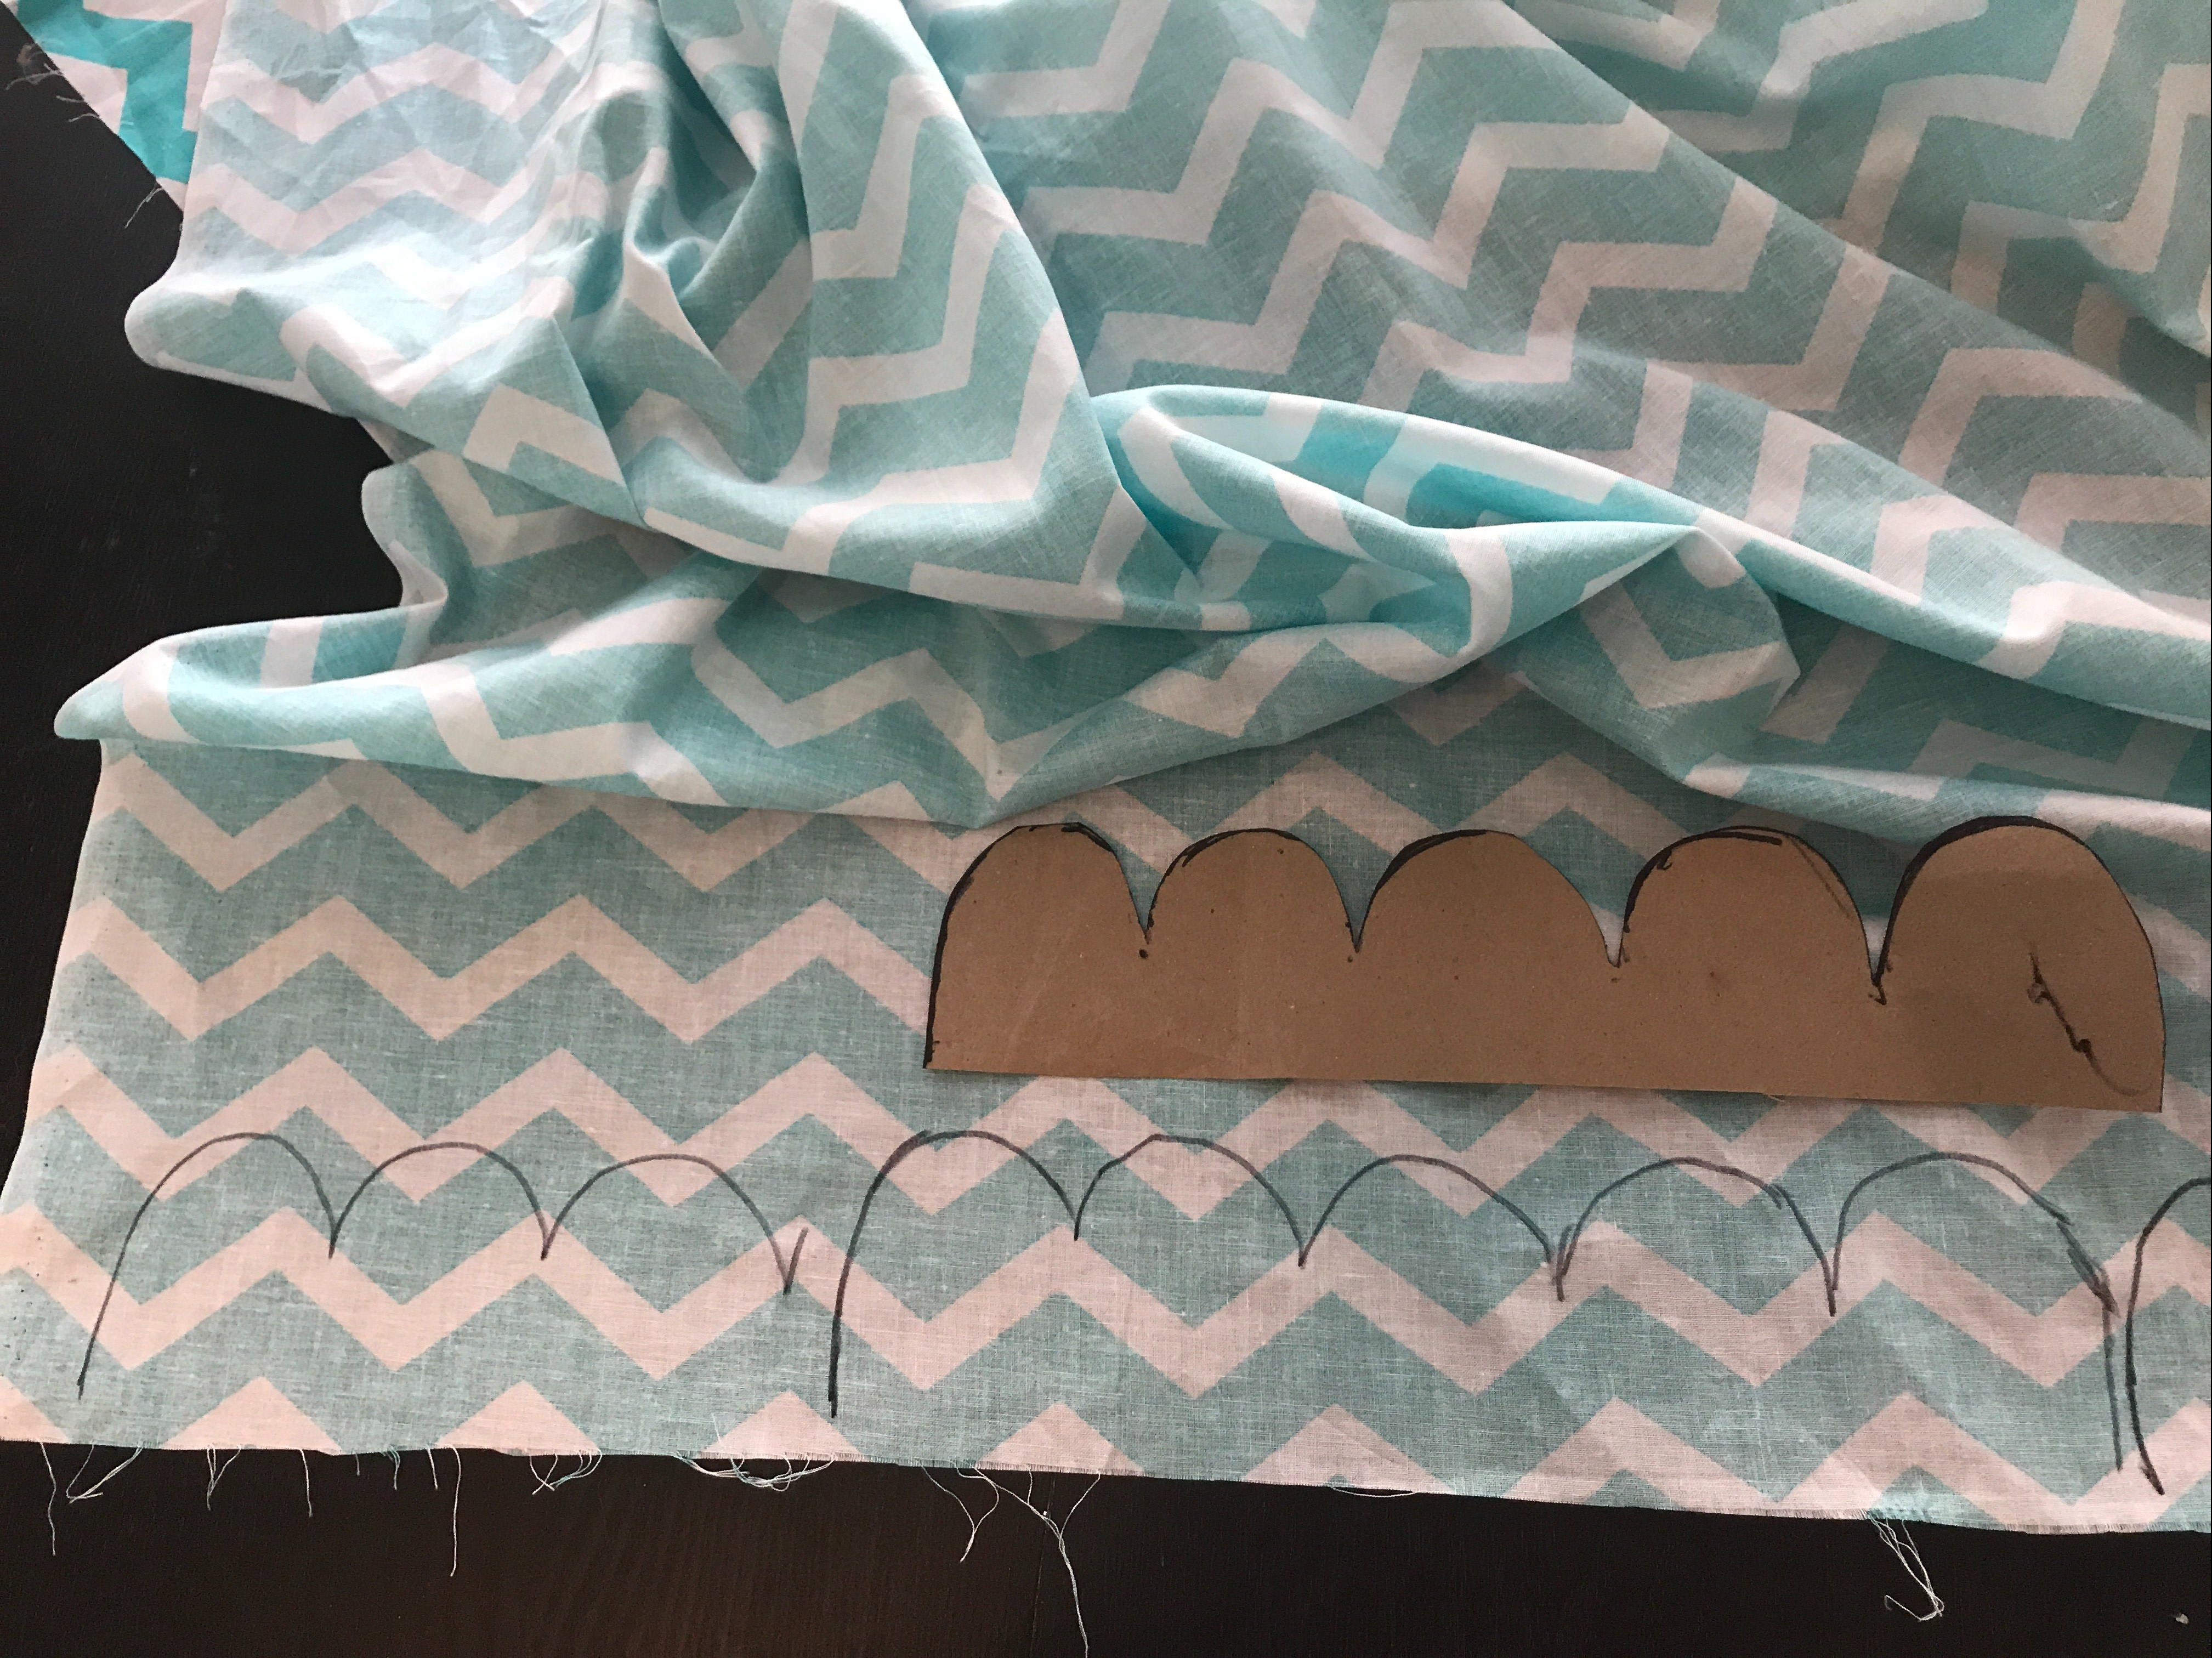
Next you’ll be making your “feathers”. I made mine 2 inches tall and 11 inches long. Again not perfect measurements. I figure it will give it an authentic look. 😉

img_4239.jpg

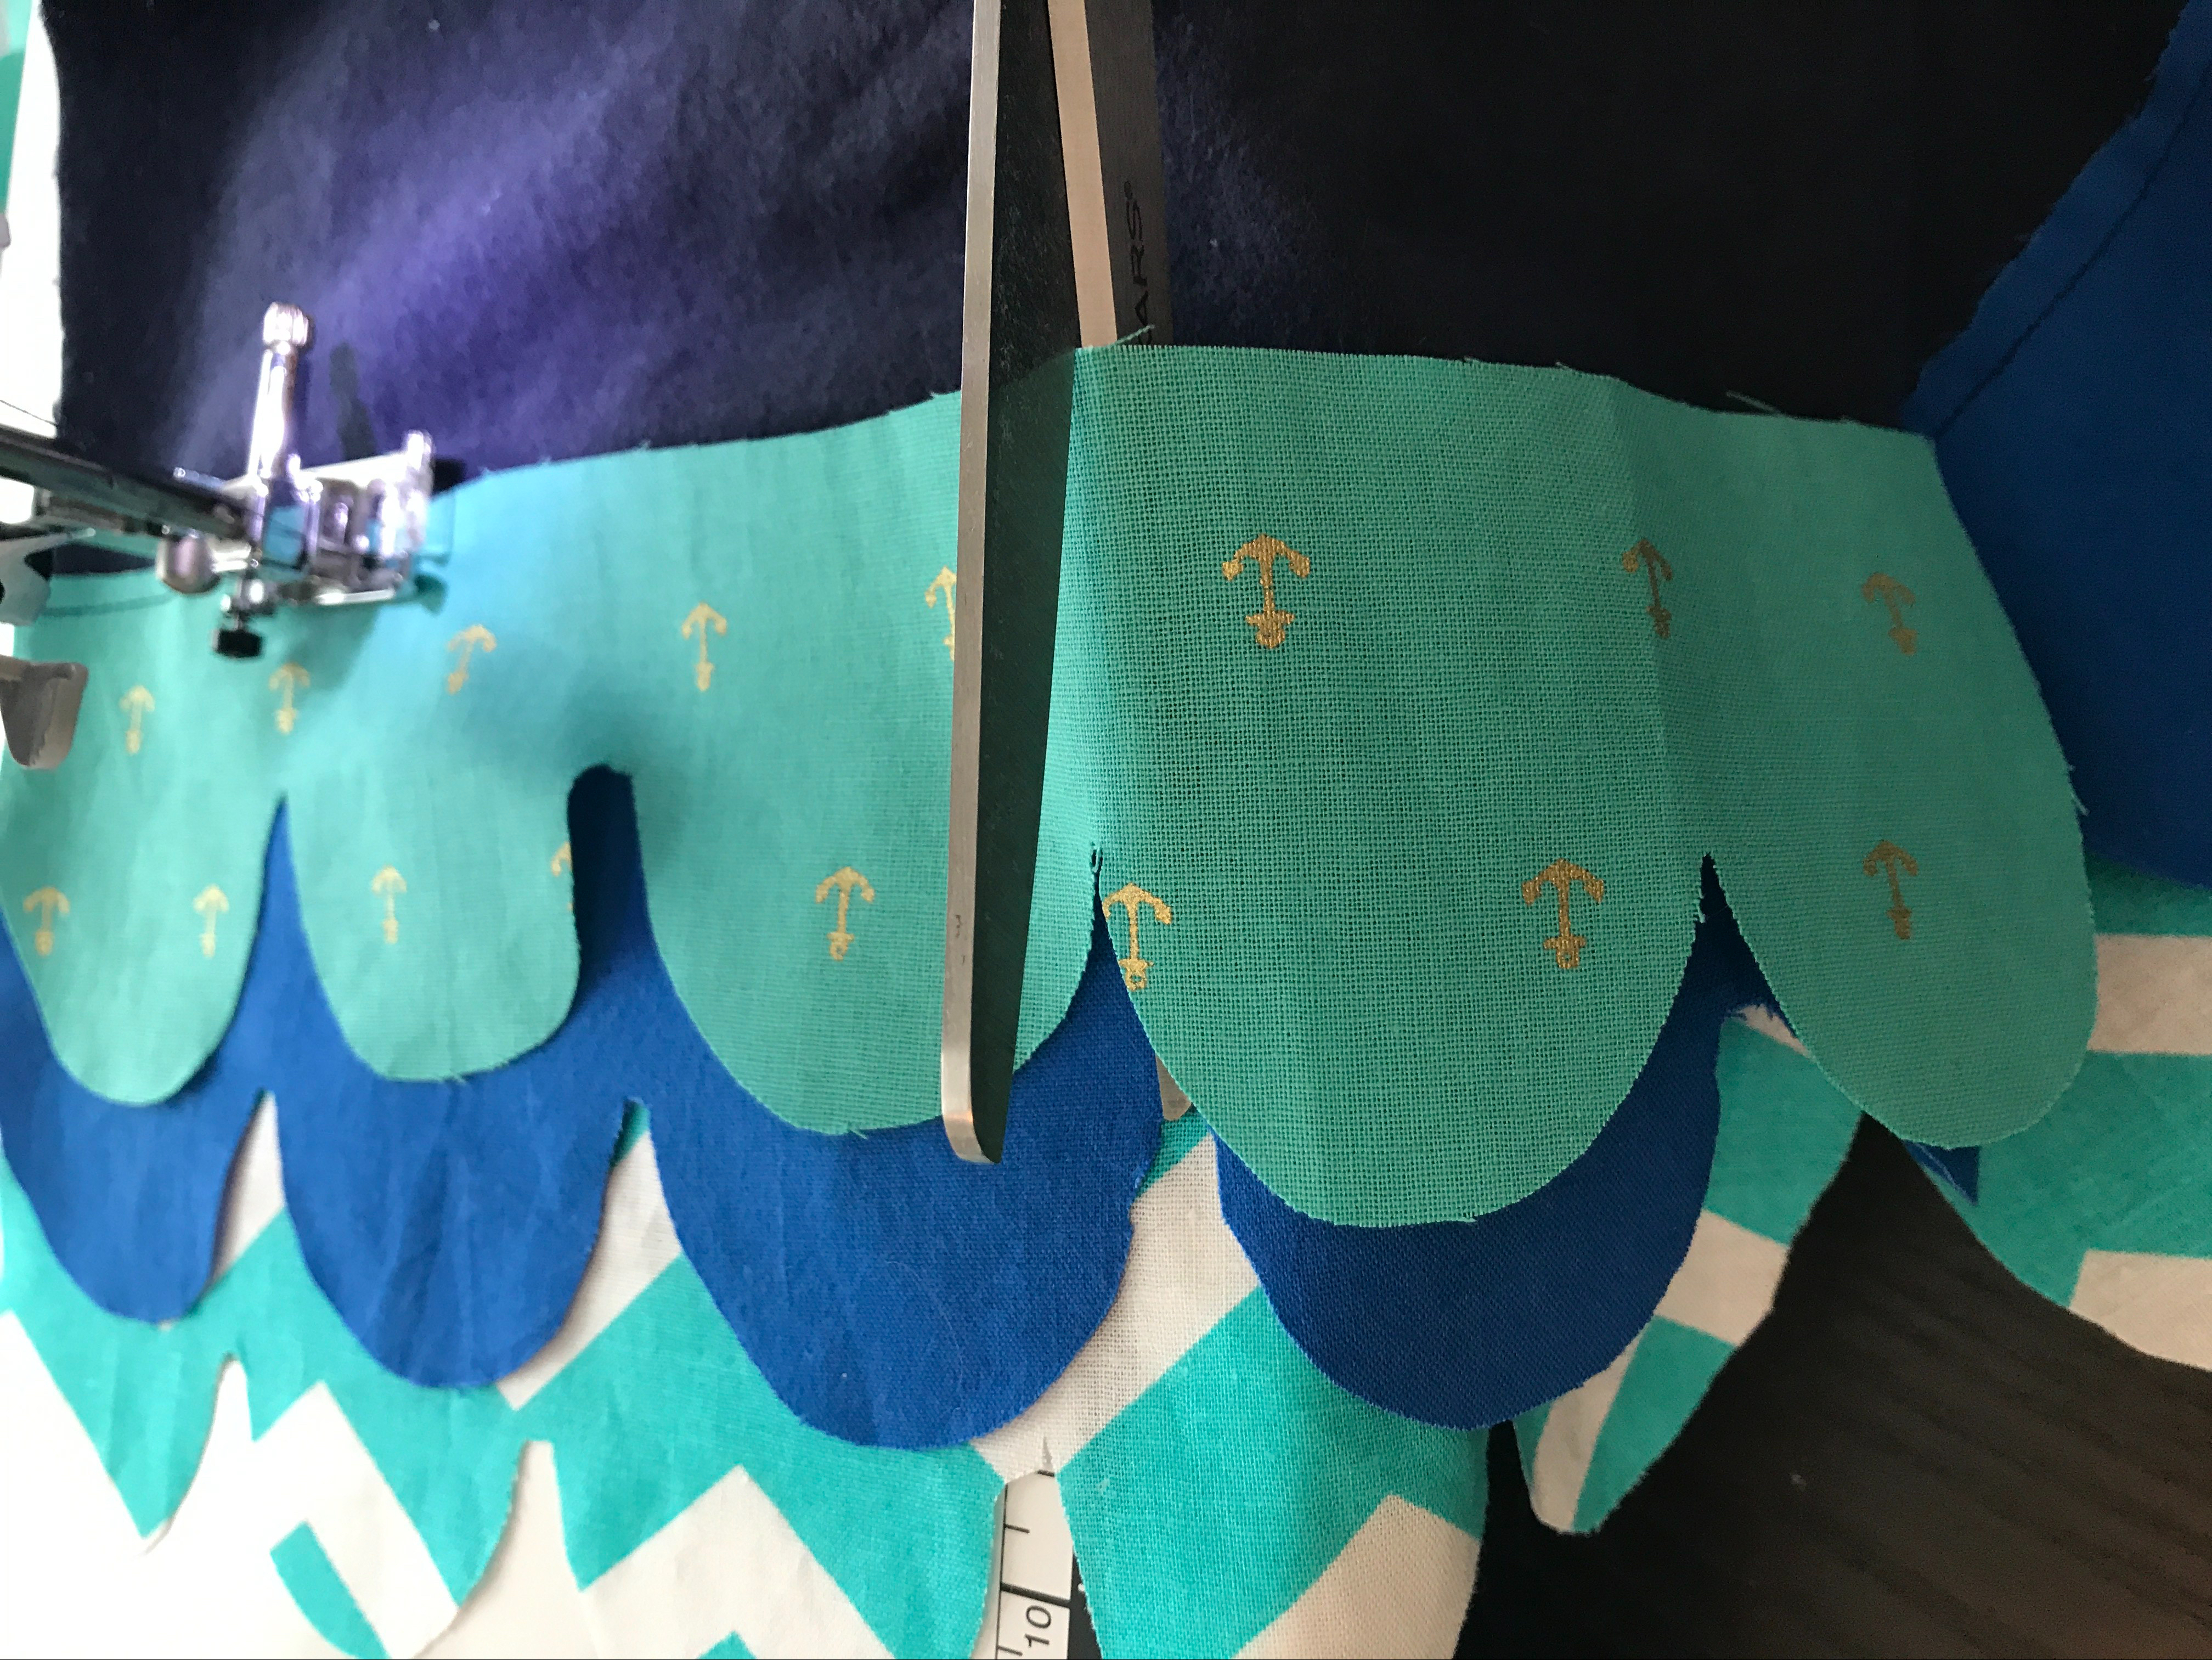
You’ll want to start at the bottom of the wings and work your way up. I found that longer pieces worked well for the first few rows but smaller pieces of 2s and 3s worked better midway up. And even single pieces at the very top. Often times I would just cut them while I was sewing when I felt like I need a bigger curve. (For the first pair of wings I did I actually pleated as I went and it took forever. Cutting was a much better way to go).

img_4242.jpg

You’re almost done!! Let your kids pick out a double fold bias tape quilt binding (maybe guide a bit to pick out a coordinating color haha) and then begin the final step. Flip the wings over and trip off any excess hanging over the inside edge where you will be putting the bias tape. Trim the bias tape to the length of the wings (inside edge). I worked from the bottom of the wings on the inside edge and stitched the tape to the wings. When I got to the top I just backstitched and cut the thread. Do the same for the other wing.

Lay the wings together on the table and run the bias tape across the top so that both inside edges are touching.

For the elastic you’ll need two measurements. Your child’s wrist measurement and their should measurement. For my kids I just looped the elastic around their wrist and shoulder and let them tell me what felt comfortable. Make two of each.

Then you’ll want to place the wrist straps on the edge of the base fabric (purple anchors here) and the shoulder straps right up to the inside edge of the bias tape. Then stitch the bias tape and adjust the elastic straps as you to go to make sure that they are securely sewn into the bias tape.

TADA!! With two kids running around helping me it took a while so there was lots of TADA-ing happening in my head.

Hope you enjoy this one with your kids (or grandkids)! My kids especially love swinging with them on to feel the wind catch them.

Happy Creating!